I am addicted to soy tarts. If you have never used a tart you are missing out and you must try some. Tarts are more or less just wick-less candles. They are usually about 1oz and most commonly are shaped like mini muffins or peanut butter cups. Though some are smaller and shaped like cute shapes. Wax tarts first were made out of paraffin wax but then started being made out of soy wax. I prefer soy because it seems to hold the scent longer, it burns much cleaner and you do not have the undertone scent of wax that seems to come with paraffin.
When making tarts it is so much easier to work with soy wax. Paraffin comes in big chunks and you have to break off chunks and it makes it a bit harder to measure out the amount you need. Soy wax comes as flakes and is much easier to measure as well as to clean up from.
I prefer to buy tarts already made because I like lots of different scents so I do not want to end up with dozens of the same scents. For awhile I made tarts that were x-rated lol. They were shaped like naughty body parts and people bought them from me to use as gag gifts. They were tons of fun to make and people thought they were so funny. I only made tarts for a few months and then went back to buying them.
I decided to make a few batches of tarts and decided to post directions with pictures to show others how to make them.
I have a large amount of tart supplies left and want to make small kits to sell so people can try a batch on their own. The kit will include enough stuff to make 2 dozen tarts. It will have a pound of soy wax, an ounce of fragrance oil, 24 (1 0z) containers with lids to pour the tarts into. It will also include a list of suppliers where you can get more supplies in larger quantity. This kit would just be perfect to see if you like making tarts and to give you an idea of what is involved.
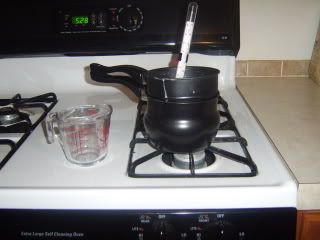
You will need to have a candy thermometer, a double boiler ( or something similar). I bought the little double boiler that I use at big lots for 8 dollars and got the candy thermometer for 3.00.
If you want to buy a kit please contact me.
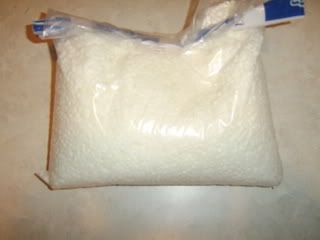
This is a bag of soy wax
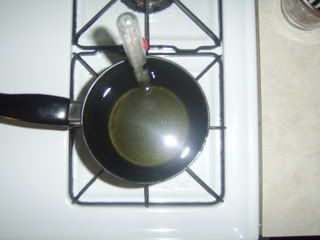
Here is my double boiler and thermometer
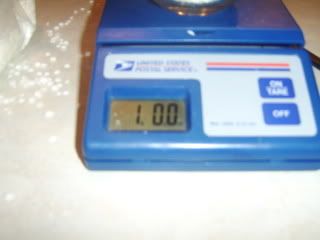
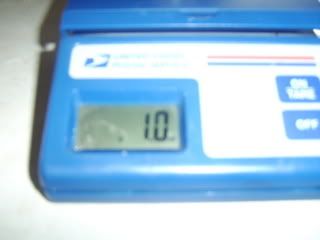
Step 1 is to weigh out the wax. I use 1 pound of wax to 1 ounce of fragrance oil
Weigh out your fragrance oil. 1 ounce of fragrance oil
Put the water into the bottom of the double boiler and put wax into the top. Melt the wax over medium heat. Stir the wax as it melts. Heat the wax up to about 135 degrees. If you decide to add coloring to your tart this is when you would add it. Take the wax off the heat. Mix in the colorant.
Let wax cool. If you add the fragrance oil when the wax is too hot, the oil will evaporate and will not scent your tart strong enough. I cool the wax to about 95 degrees and then add the fragrance oil.

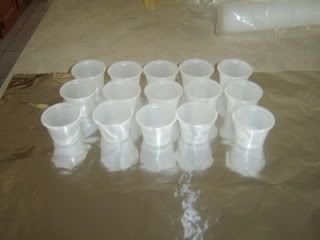
Stir the fragrance oil in well. Let the wax cool further. It will start becoming thick like slush consistency. Prepare your tart molds. You can pour into mini muffin pans or actual tart molds. I like to pour them into 1oz plastic containers and then when they cool I put a lid on them and store them that way. When I want to use the tart I just pop it out of the plastic cup.
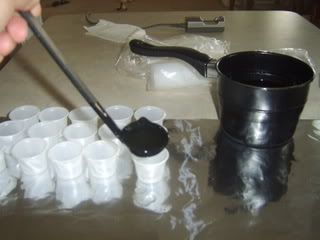
I place the cups on foil so if I spill a bit while pouring the wax it is no big deal to clean up. Once the wax is about 90 degrees or so I pour it into the molds or plastic cups.
I pour about an ounce into each cup. After it cools I put a lid on each one and put them all in a large ziploc bag. I put the bag in the freezer for about 5 minutes or so for them to firm up the rest of the way. When I am ready to use the tart I remove the tart from the plastic cup. Sometimes it pops right out easily and other times I have to cut the plastic cup a bit.
That is all there is to making tarts. Pretty easy. The pot and spoon etc clean up with soapy water.
If you have any questions or you want to order a little kit to try to make some tarts yourself you can contact me.
 This is my current sewing machine. I love it. In 1998 my husband bought me a 99 dollar sewing machine at walmart. It was a basic brother sewing machine and did not have many options. I made 2 pillows out of it and then put it in the closet. It stayed in the closet until July 2002. I had a sling for Sterling to carry him in but it was too long. I could not find any that I liked so I decided to get out my sewing machine and sew a sling. It was rather easy. A few straight seams. I was rather impressed with myself. I started wanting to sew more and more. Little tote bags, doll diapers etc. I used the old brother sewing machine until it just would not run anymore. I bought a used Elna but never quite fell in love with it. There were so many features that I wanted that the Elna did not have. One day I was checking out overstock.com and saw this sewing machine. I started reading all the features it has and was shocked at what I could get for 299 dollars ( plus free shipping lol). I love my sewing machine. It can embroider also but I do not use it too much for that.